
Why purposeful golf swing practice beats hitting balls without a plan
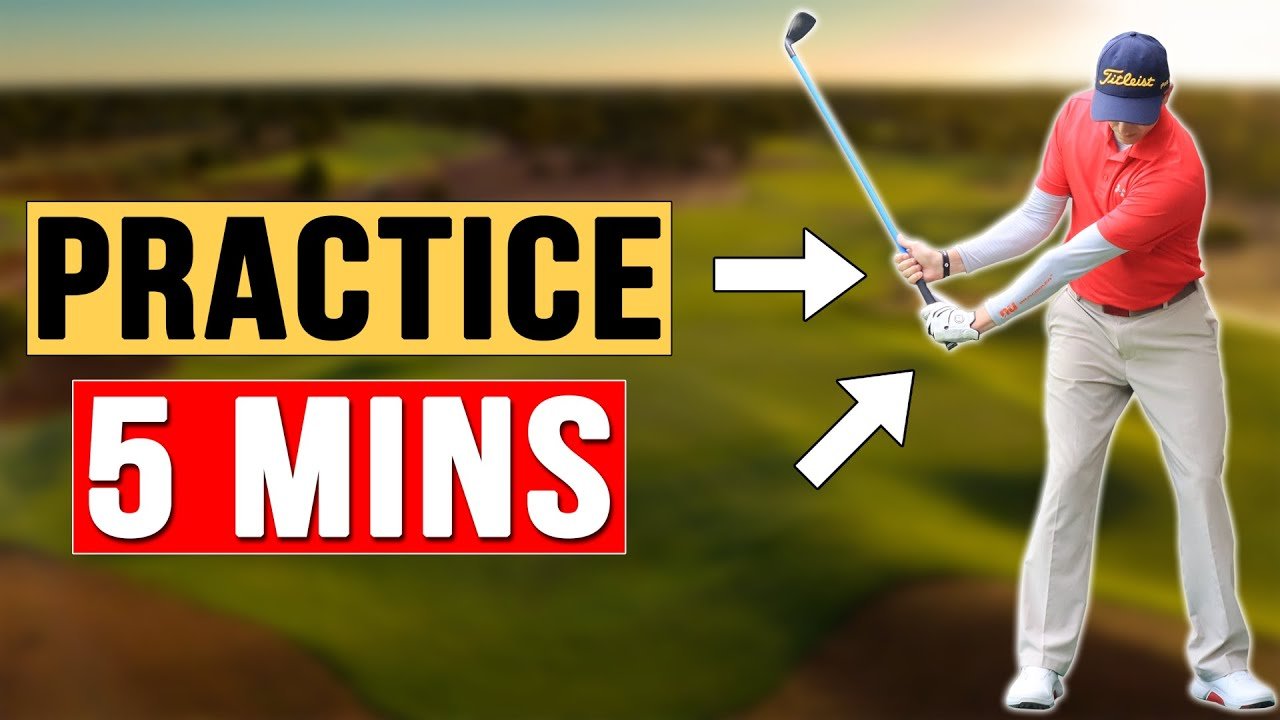
Golf swing drills work best when they train a movement you’ve identified as needing attention. Hitting ball after ball can feel productive, but Hitting It Solid Golf’s central point is that hours of practice won’t help much if you’re repeatedly rehearsing the wrong movement. The video offers three simple exercises that you can practise for about five minutes a day, with or without a ball.
The lesson focuses on coordinating pressure, body movement, and rhythm rather than asking your hands and arms to do all the work. The first exercise rehearses pressure into the trail heel, a lower, balanced transition, and a finish over the lead foot. The next two use a split-hand grip and feet-together steps to help connect upper-body movement and footwork.
That approach is useful because a swing is a sequence, not a collection of isolated positions. You can use these golf swing drills as movement rehearsals, then check whether the intended feel carries over when you hit shots. They aren’t presented as guaranteed fixes for every swing fault; they’re practice tools to try and assess.
Watch the original lesson from Hitting It Solid Golf. The video doesn’t provide timestamps, so the article’s time references are listed as unavailable rather than estimated. Use the drills as a starting point, and let your own ball flight and contact guide what you practise next.

Key takeaways: three drills for rhythm and swing control
The lesson’s three exercises share one aim: connect the movement of your feet, body, and club into a balanced swing. As the creator demonstrates, you can rehearse them without a ball and use a driver, iron, or hybrid. The object is to practise the movement, not to chase a particular shot result during every repetition.
- Trail-heel pressure: Turn back while feeling pressure toward the back of the trail heel. Then lower into a balanced position during transition and finish with most of your weight over the lead foot.
- Split-hand grip: Separate your hands on the club, like a hockey grip. Turn your shoulders and upper body, keep the trail-arm elbow pit facing forward as the club comes down, and rotate through.
- Feet-together steps: Begin with your feet close together. Let the feet move first to start the backswing version; for the downswing version, begin at the top and let the lead foot move first.
Think of the movement sequence as back, lower, through. The first position encourages pressure into the trail heel; the transition brings you into a lower, balanced position; and the finish shifts pressure onto the lead foot. Each drill highlights a different part of that sequence.
These golf swing drills can be practised in a backyard, at the range, or before a round. The video suggests roughly five minutes a day, but the time is a starting point rather than a guarantee of improvement. Keep repetitions controlled enough to notice balance, posture, and rhythm, and pause if a movement causes discomfort.

Assess your swing and scoring weaknesses before choosing a drill
Before adding golf swing drills to your routine, decide what you’re trying to improve. Is your main concern ball flight, contact, distance, consistency, or scoring? The creator encourages golfers to practise in a way that suits their current swing; a short self-assessment helps turn that advice into a specific priority rather than a guess.
Start with a simple written baseline. Record the swing flaws you notice and, if you already track them, note fairways hit, greens in regulation, up-and-down rate, and scoring or strokes-gained data. These are planning suggestions, not statistics reported by Hitting It Solid Golf. Use the same measures over time, rather than drawing conclusions from a single good or poor practice session.
Different symptoms can call for different questions. An out-to-in swing path or slice may make you investigate path and clubface control. Casting, inconsistent low point control, or changing launch angle may point your attention toward contact and delivery. None of these issues is automatically solved by one of the video’s exercises, so avoid treating a drill as a diagnosis.
If you need more information, consider swing analysis to check swing path, shoulder plane, hip sway, hip slide, pivot, and lead leg rotation. Use what you observe to build a custom training plan around your goal, experience, and available practice time. If the evidence is unclear, simplify the plan and seek qualified help rather than piling on unrelated drills.
Golf swing drills for pressure shift and a balanced pivot
The first exercise in the video breaks the motion into three positions: turn back with pressure in the trail heel, lower into a balanced transition, and swing through onto the lead foot. To begin, take your normal stance without a ball. As you turn back, feel as though your chest and back extend and you become a little taller, while keeping pressure toward the back of the trail heel—not the toe.
Next, rehearse moving lower into a squat-like transition. The creator describes a balanced feel through both heels and the middle of the feet, then pauses in that position. From there, continue through so most of your weight finishes over the lead foot. Don’t rush the sequence; the pause makes it easier to notice whether you’re stable before moving on.
Hitting It Solid Golf warns that dipping the head during the backswing can disrupt pressure distribution in the feet and may contribute to early extension. Treat this as a movement cue to observe, not a diagnosis. As you practise, notice whether your head and posture stay manageable and whether your pressure moves without losing balance.
- Rehearse the three positions slowly: trail-heel pressure, lower balanced transition, lead-foot finish.
- Pause at each position: check posture and balance before continuing.
- Link the positions: join them into one continuous motion while keeping the same controlled rhythm.
These golf swing drills also offer observation points for hip sway versus hip slide, pivot, and lead leg rotation. Those terms can help you describe what you see in a swing analysis, but the video doesn’t assess each golfer’s mechanics or prescribe a correction for them.

Use the split-hand drill to improve rotation and clubface control
The split-hand exercise is the second of the lesson’s golf swing drills. Hold the club with your hands spread apart, much like a hockey grip, and keep the club roughly parallel to the ground as you set up. The creator’s key setup cue is to point the trail-arm elbow pit forward. Use a slow rehearsal first; the wider grip is there to help you notice how your body turns.
As you move to the top of the backswing, turn your shoulders and upper body instead of making the motion only with your arms. The video describes feeling a stretch through the lats and a broader turn through the upper body. If you feel your arms working independently while your torso barely turns, reduce the speed and focus on the body movement.
On the way down, keep the elbow pit facing forward as the club approaches the delivery area. Then rotate through so the clubface can square. The creator cautions against letting the elbow pit point down, which he associates with a steeper approach. Think of the cue as a rehearsal for rotation and clubface control, not a promise that the clubface will automatically square on every shot.
If you’re working on a slice or an out-to-in swing path, the drill may give you a movement to examine, but it doesn’t establish the cause of either fault. Try several slow repetitions, notice whether the intended elbow and upper-body movement feels clear, and then hit a small number of shots to see what changes. Keep notes on contact and ball flight, and stop if the position feels uncomfortable. The aim is controlled practice, not forcing your arm into a position.

Build rhythm with the feet-together drill
The feet-together exercise connects footwork with swing rhythm. For the backswing version, begin with your feet together and let them move first as you step into the swing. Continue through with a balanced finish. The creator stresses that the feet initiate the movement; the step is not meant to become a large lunge or an attempt to generate force by itself.
For the downswing version, start at the top of a rehearsed backswing and let the lead foot move first. This encourages the legs to contribute instead of leaving the whole motion to the hands, arms, and upper body. Begin with small steps and a slow tempo. If you lose balance, make the movement smaller before trying again.
Once the separate versions feel manageable, link them together. Rehearse a small step into the backswing, reach the top, then make a small lead-foot movement and swing through. The video also says you can hit balls with the drill if you prefer. If you do, start with a safe, open practice area and a comfortable club, and keep the first attempts at a controlled pace.
Repeated, coordinated rehearsal gives you a way to practise the sequence and build a familiar movement pattern. That’s a practical motor-learning idea, not a claim that a particular number of repetitions will produce a fixed result or timeline. Use these golf swing drills to explore rhythm and flow, then check whether the movement remains balanced when you return to your normal stance and a target.
Turn five minutes of golf practice into a balanced weekly plan
The creator suggests practising for about five minutes a day and notes that the exercises can be done without a ball or with a driver, iron, or hybrid. Treat that as an accessible starting point. A broader plan should also reserve golf practice time for hitting to targets and working on the short game, including chipping, so your efforts address scoring as well as distance and power.
One practical article recommendation—not the creator’s prescribed schedule—is:
- Session 1, five minutes: Rehearse trail-heel pressure, the lower transition, and the lead-foot finish.
- Session 2, five minutes: Practise the split-hand grip slowly, focusing on upper-body turn and the forward elbow-pit cue.
- Session 3, five minutes: Work through the feet-together backswing and downswing versions.
- Session 4: Use a range session for target-based practice, changing clubs and targets rather than hitting every ball to the same place.
- Session 5: Spend a session on chipping and other short-game work.
Progress in stages: start with slow, balanced rehearsals; add a ball when the movement feels controlled; vary clubs and targets; then test the motion in on-course or pressure conditions. Adjust the schedule to your handicap and personal goals. If mobility, age, or a physical limitation makes a movement difficult, shorten or modify it rather than forcing a range of motion.
Rypstick Golf, swing speed training, Chiliwacker, and path drills are separate terms or options you may encounter while researching a specific goal. They aren’t products or methods endorsed in this video. Choose any additional practice based on the problem you’re trying to solve, and avoid adding it simply because it sounds related.
Transfer practice to the course and measure what changes
Rehearsing a movement is only one step. To see whether golf swing drills transfer, move beyond hitting the same club to the same target. Choose a target for each shot, change clubs and targets, and occasionally give a practice attempt a consequence—for example, decide in advance what counts as a successful shot. This makes practice less predictable and asks you to choose and commit to a shot.
Keep the short game in the plan. Work on chipping alongside full-swing practice so you’re not judging progress only by distance and power. A swing change may feel promising at the range, but your scoring also reflects your ability to hit greens, recover around them, and complete holes. Balance those parts of practice according to your own goals.
Track a small set of measures consistently: fairways hit, greens in regulation, up-and-down rate, scoring, and strokes gained where available. Compare results across practice periods rather than treating one strong session as proof of lasting change. If a measure doesn’t reflect your main goal, choose a more relevant one and keep the comparison consistent.
If contact or trajectory remains inconsistent, use swing analysis to investigate possibilities such as swing path, low point control, casting, and launch angle. Shoulder plane, mobility, hip sway, hip slide, pivot, and lead leg rotation may also be useful observations when choosing a manageable drill. These are topics to examine, not faults the video claims to diagnose. If you can’t tell what’s happening, get an appropriate assessment before building a more complicated custom training plan.
Conclusion: choose one movement and test it
Hitting It Solid Golf’s lesson is a reminder to practise with a purpose: five focused minutes can be more useful than repeating a movement you haven’t examined. The three exercises—trail-heel pressure with a balanced transition, the split-hand grip, and feet-together steps—offer straightforward ways to rehearse pressure shift, rotation, and rhythm without needing to hit a ball.
Start by writing down the swing or scoring issue you want to address. Choose the drill whose movement best matches that priority, rehearse it slowly, and note what you feel. Then test the movement with a ball, vary your targets, and check whether your contact, ball flight, or chosen scoring measure changes over time.
Keep the plan balanced: include full-swing work, chipping, and other short-game practice, and adapt movements to your mobility and limitations. The drills are practice options, not universal fixes. For a refresher, return to the original Hitting It Solid Golf video; its transcript supplies no timestamps, so use the three drill descriptions in this article to find the relevant demonstrations.
Key Takeaways
- Practise a specific movement rather than repeating swings without a clear purpose.
- Rehearse trail-heel pressure, a balanced lower transition, and a finish over the lead foot.
- Use the split-hand grip to practise upper-body turn and the elbow-pit cue; use feet-together steps to explore rhythm and footwork.
- Start with slow, balanced rehearsals, then add a ball, vary targets, and test the motion under playing conditions.
- Balance full-swing work with chipping and short-game practice, and track relevant results over time.
Frequently Asked Questions
What is the fastest way to improve at golf?
Identify the weakness that most affects your game, practise it deliberately, and check whether relevant results change over time. The video recommends focused movement rehearsals rather than simply hitting many balls without a plan.
What's the/30 rule in golf?
The phrase can refer to different practice or performance ideas, so there isn’t one definition that applies universally. The video doesn’t define a/30 rule; its practical recommendation is to practise three movement drills and make practice purposeful.
What's the/40 rule in golf?
The video doesn’t define a/40 rule. Golfers may use balance ratios as cues in other contexts, but that’s distinct from the lesson’s trail-heel, split-hand, and feet-together exercises.
What are the three C's of golf?
Different golfers use different versions of the phrase, so its meaning depends on the context. Hitting It Solid Golf doesn’t define the three C’s; the video demonstrates three swing exercises instead.
Can you practise these drills without hitting a ball?
Yes. The creator says the drills can be rehearsed without a ball, including at home or before a round, and also says the feet-together drill can be used while hitting balls if preferred.