
The core idea: keep the golf swing takeaway neutral
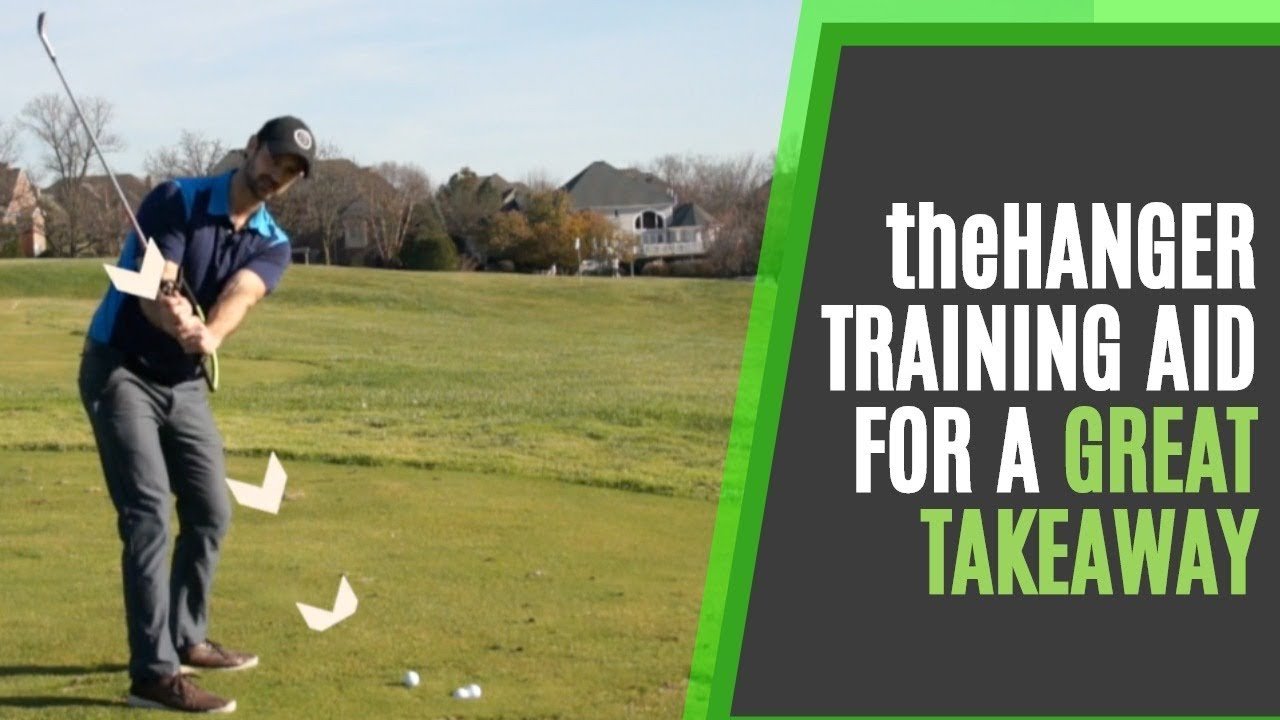
A neutral golf swing takeaway starts with coordinated movement rather than an early roll of the hands and forearms. Alex Forte of The Art of Simple Golf demonstrates the Hanger drill to help you notice when your forearms rotate so far that they press against the training aid. The aim is not to lock your arms into a pose; it’s to keep hand action controlled while your body turns.
In the video’s opening demonstration, Forte contrasts a more neutral position—with space between the forearms—with a rolled position where the arms press together against the Hanger. That contact provides feedback that the hands may be doing too much too soon. It isn’t a reason to force a rigid position, squeeze the arms together, or hit a full-power shot. Forte says to focus on getting the takeaway right rather than trying to hit big shots.
Three cues organize the drill: keep your hands neutral, turn your hips, and let the end of the Hanger point toward your belt buckle. As the club moves away, allow it to travel slightly outside the hand path before adding a small hinge. Used this way, the golf swing takeaway rehearsal is a movement check, not a demand to copy one exact picture. The Hanger gives you a simple signal during a slow golf swing takeaway: are your hands staying organized, or are your forearms rolling into the aid?

Key takeaways for a better golf swing takeaway
The creator’s main priorities are straightforward: begin from a balanced golf setup, turn the hips and torso, keep the hands neutral, and avoid rolling the arms early. Those ideas work together. If your hands move independently of your body, the clubhead can be pulled inside; if your body turns while your hands stay organized, you have a clearer checkpoint for the backswing that follows.
Use these practice landmarks to inspect the movement. They’re helpful labels for rehearsal, not exact positions prescribed by Forte:
- Position (address): Your normal setup before the club moves.
- Position 1.5 (hands at trail thigh): A midway checkpoint. Look for a clubhead that has not been snatched sharply inside by hand roll.
- Position (shaft approximately parallel to the ground): Check clubshaft direction, clubface angle, and whether your hands remain organized in front of your chest.
Forte’s description of a slightly steeper move concerns the hinge as the club rises after the takeaway begins. He pairs that backswing action with letting the club fall during the downswing—not with forcing an over-the-top move. For a repeatable golf swing takeaway, compare these landmarks without treating them as a test of perfect geometry. The golf swing takeaway should be coordinated and comfortable; use the checkpoints to spot early roll, not to manufacture a position.
Set up to make a neutral takeaway easier
Before rehearsing the golf swing takeaway, establish a neutral starting point. Forte identifies neutrality at setup as one of the video’s key priorities. Check your grip, posture, ball position, and alignment before deciding that the first move is the problem. A setup change can alter how the clubhead moves away, so changing several things at once makes it harder to tell what helped.
Use your usual grip and ball position as a starting point rather than adopting a universal prescription. If your grip turns your hands excessively, it may become harder to monitor whether the clubface is open or closed during rehearsal. Posture and ball position also affect the club’s starting relationship to you and the ground. If you’re adjusting, change just one variable and observe the result before moving on.
A target line gives you a reference for the shot, while an alignment stick can make the line easier to see during practice. These are supplemental practice tools; they aren’t shown in the supplied transcript. Try this sequence:
- Stand in balance in your normal posture.
- Aim the clubface first at your chosen target.
- Align your body to the intended line.
- Rehearse a small body turn while keeping your wrists quiet and your hands neutral.
This simple pre-swing check helps separate alignment or setup issues from a hand-action fault. Repeat the same setup before each golf swing takeaway rehearsal, and use the golf swing takeaway itself to evaluate one cue at a time.

Use the Hanger to check hand action and club direction
Forte’s central Hanger checkpoint is that its end points toward your belt buckle as your hips turn and the club moves slightly outside the hand path. From face-on and down-the-line views, the important relationship is not a frozen pose: your hands stay neutral while the clubhead avoids being flung inside by premature forearm roll. The aid should provide feedback, not be struck by your arms as you try to force a particular position.
At Position 1.5, watch whether the clubhead has been pulled inside as your hands reach your trail thigh. At Position 2, check the clubshaft direction relative to the target line and your hand path, along with the clubface angle. These are useful observations, not a requirement for every golfer to match one exact picture. Forte’s down-the-line demonstration also shows why a club that looks broadly on plane can still be accompanied by excessive arm roll.
The leading edge is the bottom edge of the clubface. Looking at its orientation during a slow rehearsal can help you notice whether the face appears open or closed; it’s a checkpoint, not a standalone diagnosis of your swing. Start with waist-high movements and watch whether the Hanger stays clear of your forearms and the face remains controlled. This makes the golf swing takeaway easier to inspect without speed disguising the motion. Use the golf swing takeaway drill slowly enough to feel whether the clubhead, hands, and body are working together.

Coordinate the swing triangle, rotation, and wrist hinge
The swing triangle describes the relationship formed by your arms and chest. Keeping your hands in front of your chest helps your arms move with shoulder rotation, chest rotation, and torso rotation instead of pulling independently behind you. That relationship supports body engagement: the hands travel because your body turns, rather than because you snatch the club away with your arms. Forte’s hip-turn cue fits this coordinated movement.
Neutral hand action does not mean that the wrists must remain fixed throughout the swing. The video shows a smooth takeaway followed by a small, slightly steeper hinge as the club rises. That is different from an aggressive early wrist hinge or a sudden roll of the forearms. The transcript doesn’t prescribe precise wrist angles or a particular amount of shoulder turn, so treat the sequence as an observable cue rather than a measurement.
Watch for three warning signs: the right elbow collapsing, the hands disappearing behind your body, or the clubhead being pulled sharply inside. If one appears, shorten the movement. Return to address, turn your torso slowly, and keep your hands in front of your chest as you move toward Position 1.5. Then add the hinge only as the club rises. This helps you rehearse a coordinated golf swing takeaway without forcing a rigid shape. For another golf swing takeaway repetition, check whether your chest and arms are moving together before you extend the backswing.
How takeaway positions shape the rest of the swing
Forte’s cause-and-effect explanation is that rolling the arms early may leave a golfer prone to coming over the top. A more neutral start, he says, can allow slight rerouting and a shallower downswing. This is a movement possibility, not a guaranteed result: your full swing includes other motions, and the transcript doesn’t promise a particular ball flight or strike simply because you used the Hanger.
In the demonstrated sequence, the club moves away with the body turn, hinges slightly as it rises, and then is allowed to fall into the downswing. The transition cue matters: don’t force an over-the-top move to start down. A poor clubface angle or path can affect strike and direction, so observe both rather than assuming that a tidy-looking backswing guarantees a particular shot.
A pressure shift from the lead side to the trail side can serve as an optional whole-swing coordination check, but it isn’t a specific prescription in Forte’s takeaway demonstration. The video emphasizes turning and neutral hands. To evaluate your own movement, record a rehearsal from face-on and down-the-line. Compare Position 1, Position 1.5, and Position for clubhead path, hand position, and clubshaft direction. Slow-motion swing analysis can make those checkpoints easier to review, but video feedback is most useful when you assess one feature at a time. Review a golf swing takeaway without inferring a fault from one frame alone; compare the sequence across views. That gives your next golf swing takeaway rehearsal a specific purpose.
Common takeaway faults and practical corrections
When a golf swing takeaway feels unreliable, identify the visible fault before adding another swing thought. Forte’s bad-versus-better demonstration focuses on early arm roll and the sensation of the Hanger pressing against the forearms. The corrections below turn that feedback into a manageable rehearsal rather than asking you to rebuild your whole swing at once.
- Rolling the forearms early: Move your hands away with your body turn. Keep the Hanger from pressing into your arms, and pause if you feel that contact begin.
- Pulling the club inside: Rehearse until the clubhead stays slightly outside your hand path. Check that the Hanger’s end points toward your belt buckle; don’t force a sudden outward reroute.
- Hinging too early or holding the wrists rigid: First make a smooth, coordinated movement away. Then allow a small hinge as the club rises, rather than flipping the wrists at the start or locking them.
- Losing the hands in relation to the chest or collapsing the right elbow: Shorten the rehearsal and restore the swing triangle. Turn your torso instead of pulling with an isolated arm action.
A further mistake is copying one takeaway regardless of club, shot type, or natural swing style. Keep the neutral-hand intention, but adapt the range and feel to your chosen club and shot. Forte’s video doesn’t offer club-specific prescriptions, so avoid treating the drill as one mandatory shape. When a cue makes the movement less comfortable or less coordinated, return to a smaller rehearsal and check the basics before trying again.
A step-by-step Hanger practice progression
The following practice plan is an added progression based on Forte’s slow-rehearsal approach. The creator doesn’t give a repetition count, so these suggested repetitions are a simple structure for practice, not a number attributed to the video. Work at a comfortable speed; the goal is to notice the movement, not to create a powerful shot.
- Set up normally. Check balance, grip comfort, clubface aim, and body alignment before moving the club.
- Rehearse to Position 1.5 five times. Move from Position (address) until your hands reach your trail thigh. Turn your body, keep your hands neutral, and point the Hanger’s end toward your belt buckle.
- Rehearse to Position five times. Pause when the shaft is approximately parallel to the ground. Check clubshaft direction, clubface angle, and whether the clubhead remains slightly outside the hand path.
- Make five smooth half-swings. Allow the wrists to hinge naturally as the club rises, then let it fall during the downswing. Focus on motion quality rather than speed or distance.
- Hit a small set of easy shots. Review one face-on or down-the-line recording. If you still see early roll or an inside snatch, change only one cue for the next set.
Adapt the range of motion if you have mobility limitations, an injury, or a body type that makes a full rehearsal uncomfortable. Shorten the backswing, stay within a comfortable range, and stop if the drill causes pain. Seek qualified instruction or medical advice when needed. Your video feedback should help you answer one question—such as whether the clubhead is snatched inside—not encourage you to chase a perfect frame. Carry that measured approach into every golf swing takeaway practice session.

Conclusion: rehearse a neutral start, then build the swing
The practical message from Alex Forte’s demonstration is to organize the start before adding speed. Begin with a balanced setup, turn your hips and torso, keep your hands neutral, and use the Hanger’s belt-buckle cue to notice excessive forearm roll. Position 1.5 and Position give you convenient landmarks for checking the clubhead path, clubshaft direction, and clubface angle without demanding that every golfer match one exact picture.
For your next session, make a few slow rehearsals, record one face-on or down-the-line view, and inspect a single checkpoint. If the clubhead is pulled inside or the Hanger presses into your forearms, shorten the movement and restore the body turn before continuing. Then make easy half-swings and let the club fall into the downswing rather than forcing a transition. Keep the range comfortable, stop if you feel pain, and seek qualified help when needed. The goal is a repeatable, coordinated start you can evaluate—not a rigid shape or a promised result.
Watch the original demonstration on The Art of Simple Golf’s YouTube video. The supplied transcript doesn’t include timestamps, so the key timestamps are listed as unavailable rather than estimated.
Key Takeaways
- Begin from a balanced setup and turn your hips and torso rather than rolling your hands and forearms early.
- Use the Hanger as feedback: its end points toward the belt buckle, and your forearms shouldn’t strike against it.
- Check Position 1.5 and Position for clubhead path, clubshaft direction, clubface angle, and organized hands.
- After a smooth takeaway and small hinge, let the club fall into the downswing instead of forcing an over-the-top move.
- Practise slowly, review one video checkpoint at a time, and adapt the range of motion to comfort.
Frequently Asked Questions
Should the clubhead move inside or outside during the takeaway?
Forte’s cue is to let the clubhead move slightly outside the hand path instead of snatching it inside through early forearm roll. Treat this as a slow-rehearsal checkpoint, not a forced reroute.
Should your wrists hinge during the takeaway?
The video shows a smooth initial movement followed by a small hinge as the club rises. Avoid both an aggressive immediate wrist action and forcing the wrists to stay rigid.
What should the Hanger point toward?
Forte says the end of the Hanger should point toward your belt buckle as your hips turn. Use that direction to monitor hand action rather than pressing the aid against your arms.
Can a takeaway look on plane and still be faulty?
Yes. Forte demonstrates that the club can appear on plane while the arms roll, a pattern he says may leave a golfer prone to coming over the top. Check forearm action and hand position along with the clubshaft.
Do all clubs and golfers need the same takeaway?
The video doesn’t prescribe individual or club-specific variations. Retain the neutral-hand and coordinated-turn ideas, but adapt the rehearsal to your club, shot, swing style, and comfortable range of motion.